Gorro das ovelhinhas / Little sheep hat
Assim que vi este gorro pela primeira vez fiquei fascinada! Achei as ovelhinhas absolutamente adoráveis!
Mas depois fui acometida do habitual pensamento pessimista: "ah isto é muito complicado de tricotar... nunca vou ser capaz de tricotar um gorro assim...!"
Mas como em tudo na vida, e tendo em conta que aprendi a tricotar aos 32 anos, achei que o que tinha a fazer era empenhar-me em ser capaz de tricotar uma peça assim. Prometi a mim mesma que venceria o medo de tricotar com duas cores.
Mas depois, e como sempre para tornar as coisas mais complicadas, decidi que queria aprender a tricotar a duas cores, usando a técnica portuguesa de tricotar, passando os fios ao pescoço.
Procurei tutoriais e apenas conseguia encontrar vídeos onde a técnica ou era continental ou então inglesa. Os dois ou três vídeos que encontrei que mostravam o tricot à portuguesa com duas cores era feito pelo lado do avesso, em ponto de liga. O que me colocava um obstáculo, já que o esquema estava escrito para ser tricotado do lado direito, em ponto de meia.
Por isso, ou refazia o esquema todo para ponto de liga e assim tricotar pelo lado do avesso ou aprendia a tricotar à portuguesa em meia.
Ainda fiz algumas tentativas por iniciativa própria, tentando descobrir a "mecânica" da coisa sozinha, mas sem sucesso nenhum.
Até que um dia me lembrei que no grupo de tricot onde costumo ir ocasionalmente, havia quem soubesse tricotar à portuguesa com duas cores. Decidi então pedir que me ensinassem. E foi tão fácil e simples aprender! Senti-me mesmo como uma criança que descobriu a chave da loja de guloseimas!
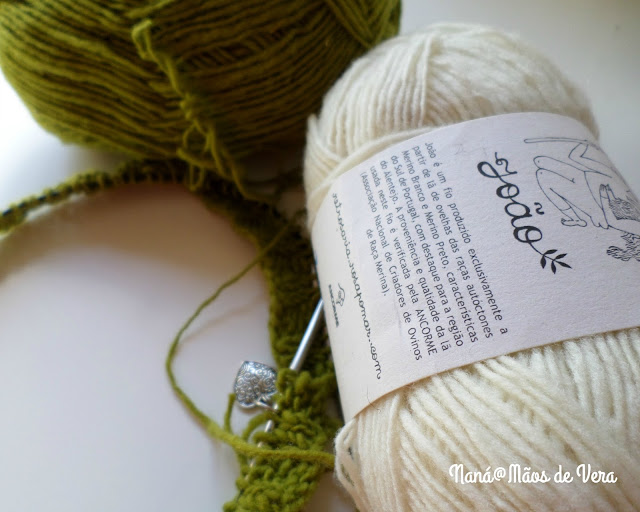
O fio já tinha sido comprado havia uns 6 meses e optei por lã 100% portuguesa, o João da Retrosaria, da Rosa Pomar. Achei que seria a lã ideal para este projecto e não me enganei! Aliás, a expectativa, que já de si era elevada, foi largamente superada.
Tricotar este gorro foi uma delícia! O esquema está muito bem escrito, simples e directo, como eu gosto. Seguir o gráfico de cores foi a coisa mais fácil do mundo! Tricotei-o em pouco tempo, cerca de 3/4 serões, o que para os meus parâmetros é rapidíssimo!
Mas depois vi-me confrontada com a questão importante de prender os fios pelo avesso, isto porque me ensinaram também , mas não fixei bem na altura... o que resultou em ter que recorrer ao tutorial muito útil da Andrea do podcast Fruity Knitting, (episódio 18) onde ela explica como se faz isso, mas tricota com uma cor na mão direita à inglesa e a outra cor na mão esquerda à continental.
Portanto, este gorro foi tricotado até certo ponto usando a técnica portuguesa com fio passado ao pescoço, e uma cor em cada mão, e depois foi tricotado usando simultaneamente o método à inglesa e á continental com uma cor em cada mão e por fim, o métdo com que me senti mais confortável, à portuguesa com uma cor na mão direita e à continental com a outra cor na mão esquerda.
Foi uma curva de aprendizagem tremenda para mim e posso afirmar sem sombra de dúvida que todo um mundo de esquemas de camisolas e casacos se abriu para mim, porque agora sinto-me com confiança suficiente para tricotar esquemas com mais do que uma cor em simultâneo.
Fiquei com um gorro que é super quentinho e a lã é muito macia!


As soon as I saw this hat, I was fascinated! I thought that the little sheep were just so adorable!
But then I was immediately caught in the usual pessimistic thinking: "oh this is way too complicated to knit... I'll never be able to knit something like that...!"
But just like anything in life, and considering the fact that I only learned to knit when I was 32 years old, I thought that all I had to do was to commit myself to being able to knit a piece like this. I promised myself I would loose the fear of knitting with two colors.
But afterwards, and as usual to complicate things even more, I decided that I had to learn to knit in the portuguese style (also peruvian style) using the technique where we use both strands aroun the neck.
I looked for tutorials but all I could find were videos were the stranded knitting was made in the continental style or the english style. The very few (two or three) videos I could find on stranded knitting in the portuguese style were of pieces knitted in the wrong side, with purl stitch. Which posed an obstacle, since the pattern is meant to be knit in the right side, in the knit stitch.
So I either would have to re-write the all pattern to knit it in the purl stitch or would have to learn to knit the portuguese style in the knit stitch.
Even so, I still made some attempts on my own, trying to figure out the "mechanics" of the thing, but I was quite unsuccessful.
Until one day I just remembered that in the knitting group I occasionally go to, there are people who know how to knit stranded. So I decided to ask them to teach me. And it was so easy to learn! I felt just like a child who caught the keys to the candy store!
The yarn had already been bought six months earlier , I chose the 100% portuguese João yarn, from Retrosaria by Rosa Pomar. I thought that this would be the ideal yarn for this project and wasn't wrong! In fact, although the expectation was high, it was largely met.
Knitting this hat was a delight! The pattern is very well written, simple and straightforward, just as I like it. Following the color graphic was a piece of cake! I finished it in no time, it took me 3/4 evenings, which is really fast by my standards!
But then I got confronted with the important issue of catching the floats, although they taught me how to do that, I didn't memorize it very well... which meant that I had to look for tutorials on how to do it, and Andrea's tutorial from the Fruity Knitting podcast, in episode 18 was very useful, where she explains how to do that, but she knits with one color in the right hand in the english style and the other color in the left hand in the continental style.
So, this hat was knit to a certain point in the portuguese style, with both strands accross my neck, one color in each hand, and then was knit in the english style combined with continental style, with a color in each hand, and finally in the method I felt most confortable with, a combination of portuguese style with one color in my right hand, and the continental style with the other color in the left hand.
It was a tremendous learning curve for me and I can safely say that this openned a whole new world of patterns for me, because now I feel confident enough to knit stranded knitting patterns.
And I now have a hat that is super warm and the fabric is super soft!
Mas depois fui acometida do habitual pensamento pessimista: "ah isto é muito complicado de tricotar... nunca vou ser capaz de tricotar um gorro assim...!"
Mas como em tudo na vida, e tendo em conta que aprendi a tricotar aos 32 anos, achei que o que tinha a fazer era empenhar-me em ser capaz de tricotar uma peça assim. Prometi a mim mesma que venceria o medo de tricotar com duas cores.
Mas depois, e como sempre para tornar as coisas mais complicadas, decidi que queria aprender a tricotar a duas cores, usando a técnica portuguesa de tricotar, passando os fios ao pescoço.
Procurei tutoriais e apenas conseguia encontrar vídeos onde a técnica ou era continental ou então inglesa. Os dois ou três vídeos que encontrei que mostravam o tricot à portuguesa com duas cores era feito pelo lado do avesso, em ponto de liga. O que me colocava um obstáculo, já que o esquema estava escrito para ser tricotado do lado direito, em ponto de meia.
Por isso, ou refazia o esquema todo para ponto de liga e assim tricotar pelo lado do avesso ou aprendia a tricotar à portuguesa em meia.
Ainda fiz algumas tentativas por iniciativa própria, tentando descobrir a "mecânica" da coisa sozinha, mas sem sucesso nenhum.
Até que um dia me lembrei que no grupo de tricot onde costumo ir ocasionalmente, havia quem soubesse tricotar à portuguesa com duas cores. Decidi então pedir que me ensinassem. E foi tão fácil e simples aprender! Senti-me mesmo como uma criança que descobriu a chave da loja de guloseimas!
O fio já tinha sido comprado havia uns 6 meses e optei por lã 100% portuguesa, o João da Retrosaria, da Rosa Pomar. Achei que seria a lã ideal para este projecto e não me enganei! Aliás, a expectativa, que já de si era elevada, foi largamente superada.
Tricotar este gorro foi uma delícia! O esquema está muito bem escrito, simples e directo, como eu gosto. Seguir o gráfico de cores foi a coisa mais fácil do mundo! Tricotei-o em pouco tempo, cerca de 3/4 serões, o que para os meus parâmetros é rapidíssimo!
Mas depois vi-me confrontada com a questão importante de prender os fios pelo avesso, isto porque me ensinaram também , mas não fixei bem na altura... o que resultou em ter que recorrer ao tutorial muito útil da Andrea do podcast Fruity Knitting, (episódio 18) onde ela explica como se faz isso, mas tricota com uma cor na mão direita à inglesa e a outra cor na mão esquerda à continental.
Portanto, este gorro foi tricotado até certo ponto usando a técnica portuguesa com fio passado ao pescoço, e uma cor em cada mão, e depois foi tricotado usando simultaneamente o método à inglesa e á continental com uma cor em cada mão e por fim, o métdo com que me senti mais confortável, à portuguesa com uma cor na mão direita e à continental com a outra cor na mão esquerda.
Foi uma curva de aprendizagem tremenda para mim e posso afirmar sem sombra de dúvida que todo um mundo de esquemas de camisolas e casacos se abriu para mim, porque agora sinto-me com confiança suficiente para tricotar esquemas com mais do que uma cor em simultâneo.
Fiquei com um gorro que é super quentinho e a lã é muito macia!


*****
But then I was immediately caught in the usual pessimistic thinking: "oh this is way too complicated to knit... I'll never be able to knit something like that...!"
But just like anything in life, and considering the fact that I only learned to knit when I was 32 years old, I thought that all I had to do was to commit myself to being able to knit a piece like this. I promised myself I would loose the fear of knitting with two colors.
But afterwards, and as usual to complicate things even more, I decided that I had to learn to knit in the portuguese style (also peruvian style) using the technique where we use both strands aroun the neck.
I looked for tutorials but all I could find were videos were the stranded knitting was made in the continental style or the english style. The very few (two or three) videos I could find on stranded knitting in the portuguese style were of pieces knitted in the wrong side, with purl stitch. Which posed an obstacle, since the pattern is meant to be knit in the right side, in the knit stitch.
So I either would have to re-write the all pattern to knit it in the purl stitch or would have to learn to knit the portuguese style in the knit stitch.
Even so, I still made some attempts on my own, trying to figure out the "mechanics" of the thing, but I was quite unsuccessful.
Until one day I just remembered that in the knitting group I occasionally go to, there are people who know how to knit stranded. So I decided to ask them to teach me. And it was so easy to learn! I felt just like a child who caught the keys to the candy store!
The yarn had already been bought six months earlier , I chose the 100% portuguese João yarn, from Retrosaria by Rosa Pomar. I thought that this would be the ideal yarn for this project and wasn't wrong! In fact, although the expectation was high, it was largely met.
Knitting this hat was a delight! The pattern is very well written, simple and straightforward, just as I like it. Following the color graphic was a piece of cake! I finished it in no time, it took me 3/4 evenings, which is really fast by my standards!
But then I got confronted with the important issue of catching the floats, although they taught me how to do that, I didn't memorize it very well... which meant that I had to look for tutorials on how to do it, and Andrea's tutorial from the Fruity Knitting podcast, in episode 18 was very useful, where she explains how to do that, but she knits with one color in the right hand in the english style and the other color in the left hand in the continental style.
So, this hat was knit to a certain point in the portuguese style, with both strands accross my neck, one color in each hand, and then was knit in the english style combined with continental style, with a color in each hand, and finally in the method I felt most confortable with, a combination of portuguese style with one color in my right hand, and the continental style with the other color in the left hand.
It was a tremendous learning curve for me and I can safely say that this openned a whole new world of patterns for me, because now I feel confident enough to knit stranded knitting patterns.
And I now have a hat that is super warm and the fabric is super soft!


Adorei o gorro, é lindíssimo!! Beijinhos
ResponderEliminarObrigada Joana! A designer deste modelo fez um trabalho espectacular e muito divertido de tricotar! :)
EliminarBeijinhos
Ficou fantástico, parabéns pela subida de mais uma escada no tricot!
ResponderEliminarOlha, ontem iniciei uma gola com um fio que adquiri na Retrosaria Rosa Pomar e nada melhor para proteger o meu trabalho dumas mãozinhas pequeninas que andam cá por casa à velocidade da luz que a prenda que recebi no Natal, a tua maravilhosa bolsa :-)
Bjs
Bjs
É tão bom saber que está a ser bem usado e com muito carinho!
EliminarDepois quero ver esse trabalho :)
Bjs
Adorei!
ResponderEliminarQue lindo ficou!
Beijinhos
Olá Nina, obrigada!
Eliminarbeijinhos
Um degrau bem subido, está top o gorro das ovelhinhas.
ResponderEliminarMuito te riste quando viste que era tão fácil tricotar com mais que um fio.
Primeiras palavras: já posso fazer o meu gorro das ovelhinhas.
E assim nasceu uma peça linda, onde vais fazer um belo desfile com ele na cabeça.
Beijinho
Foi mesmo, estavas lá a ver como eu parecia uma patetinha :)
EliminarTenho mesmo andado a desfilar!
Muito, muito bonito, Náná. As cores, o desenho, uma graça mesmo. Aceitaste o desafio e superaste. Parabéns! bj
ResponderEliminar